Disclaimer*: The articles shared under 'Your Voice' section are sent to us by contributors and we neither confirm nor deny the authenticity of any facts stated below. Parhlo will not be liable for any false, inaccurate, inappropriate or incomplete information presented on the website. Read our disclaimer.
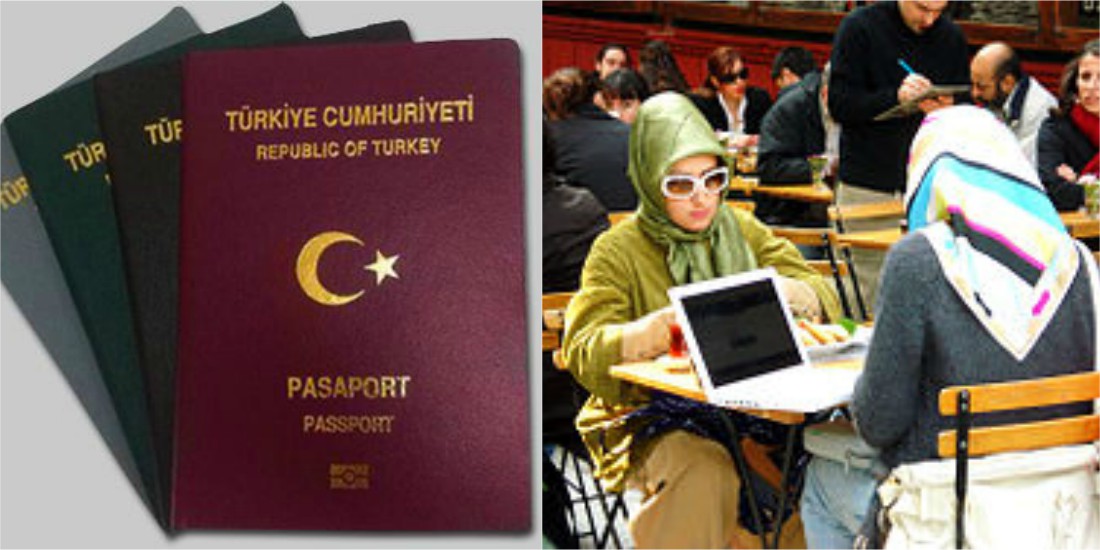
It is an unfortunate but kind of an obvious fact that the Pakistani passport ranks the third-lowest in the world; superior only to Afghanistan and Iran. There are only a very few countries which allow Pakistanis to enter their territory without a visa. So when I received an admission letter from Bilkent University, I ultimately needed to apply for a Turkish visa to pursue my master’s studies.
When I was applying for the visa, I had never traveled outside of Pakistan before. So, the visa process seemed too much intimidating to me. There were too many documents to be produced for the application and with only two months in my hand to prepare for my departure, the process seemed to be quite difficult.
[adinserter block= “3”]
Here is a step by step guide on how I proceeded with my Turkish student visa application. I have made this blog in hopes that it will make the process easier for you.
Online Application form

Source: College of the North Atlantic – Qatar
The first step in the visa application is to fill the online form on the Turkish Consulate Procedures website. You have to fill this form online, then take a printout of the application and lastly, you have to sign it. This is the first document required in the visa application. If you are applying for a student visa to pursue a bachelors, masters or a Ph.D. program in Turkey, the following is the information that you have to enter in the online form. I have mainly described those fields in which I had a bit of a confusion while filling them in:
- Nationality and Visa Details
- Type of Travel Document: Ordinary Passport
- Type of Visa: Student/Education Visa
- Purpose of Trip: Education Purpose
- Number of Entry Requested: Single entry
- Country: Choose the country name from where you are applying for the visa
- Mission: Turkish Embassy in Islamabad (Choose the embassy in your country in which you wish to send your visa application)
Shown below is the screenshot of Gerry’s Visa Drop Box website which mentions the visa fees for different types of visa:
Personal Information

Source: University of Westminster
In this section, a list of the required documents is mentioned. The documents mentioned here are the only ones needed with the application. The documents listed below have to be attached with the print-out of the online application.
1. Visa Application Form
This is the form which you are filling online. When you have completed the online application, you have to take its printout and sign it.
2. Passport or Travel Document
You obviously need your passport to apply for the visa. When you submit your application at Gerry’s, you have to submit your passport as well. The passport must be valid for at least 6 months from the date of your arrival in Turkey. After you get your visa, a visa sticker is pasted on a page of the visa section on your passport.
3. Copy of Recent and Old Passports
Source: samaa.tv
You need the photocopies of all the used pages of your passport. In my case, when I was applying for the visa, I had to get a new passport made because I had lost my previous passport. The people at Gerry’s told me to attach the photocopy of the lost passport as well. I had the scanned copy of the lost passport so I printed it out and attached it with my application as well. Also, my passport was empty because I had never traveled outside of the country before. So in case of an empty passport, you have to attach the copy of only the first four pages.
Keep in mind that when you get your passport photocopied, it is a small image on a page. Gerry’s does not accept such a photocopy. You have to scan the passport, increase the image size and expand it fully on an A4 page. This is the image that you are going to print. I took a color photocopy but I think that a black and white photocopy will work as well. I printed two pages of the passport on a single page.
4. Biometric Photographs
Don’t get confused by the term “biometric photograph”. It’s just a simple photograph that you can get taken from any photo studio but it has to have the following characteristics:
- It must have a white background
- Its size must be 5×5 cm
You need two biometric photographs for the application.
Alert: Get the picture scanned or ask the photo studio to email it to you. You will need to upload this picture online.
[adinserter block= “10”]
5. Travel Health Insurance Certificate

Source: Shaheen Insurance
For the visa application, you need a travel health insurance certificate, valid 90 days from your entry date in Turkey. You can get this certificate from a travel agency. As I am from Islamabad, I found multiple travel agencies who were selling the insurance. Just go to a travel agency near you and ask them about it. If they don’t have it, you can ask them to refer you to an agent who does. My insurance was UIC (United Insurance Company) Travel and Health Guard. It was the Gold package with a cost of Rs. 5480 inclusive of tax. Following are some locations in Islamabad where you can get the insurance.
- Iqbal Manpower Consultants in Sector I-8/4 ——- costs around Rs. 5500
- Waqas Travel & Tours in Centaurus —————– costs around Rs. 5500
- Rehman Travels in Blue Area ———————— costs around Rs. 6800
- Gerry’s Visa Dropbox ——————————— costs around Rs. 5500
There are many other places as well from where you can obtain the insurance. But be careful not to waste extra money on it. Some companies even charge up to Rs. 10000. You have to find agencies that sell the insurance at a lower rate. You have to submit the original insurance document with the application.
Alert: Get this document scanned. You will need to upload this document online.
6. Polio Vaccination Certificate
The polio vaccination certificate can be obtained from any government hospital. In the twin cities, it can be obtained from PIMS hospital or Holy Family hospital. I got it from Holy Family Hospital in Satellite Town, Rawalpindi. You need a copy of your passport for getting the certificate. First, they enter your details in a form. Next, they put 2-3 drops of the vaccination in your mouth. (Be warned that the drops are really really sour!). Lastly, they made me put my thumbprint on the form. The form is then signed by a doctor. And voila! You have your polio vaccination certificate.
This certificate is on a small piece of paper. It’s not too small but its smaller than an A4 page. So, you have to get it printed out the same way as mentioned before regarding the passport copy. You will get it scanned and then printed with the Fit option of print settings set as “Fill Page”. This automatically expands the image to the whole page. Keep the original copy of the polio vaccination certificate with yourself and attach the printed copy with the application.
7. Copy of Flight Reservation

Source: Cyber Safe Warwickshire
You can get a flight reservation online from websites of different airways. One such airway is Qatar Airways. You can choose a flight and make a free reservation that lasts up to 24 hours. The reservation can be printed and then attached with the application. To be on the safer side, take the reservation within the last 24 hours before submitting your application at Gerry’s.
The flight reservation can also be easily obtained from any travel agency. I got mine from the same travel agent from whom I bought the travel health insurance. They give it free of charge. Keep in mind that your flight date must be on or after the start date of your travel insurance.
8. Acceptance Letter from University

Source: Shiksha Study Abroad
The people at Gerry’s demand the original copy of the acceptance letter. But the problem is that the most of the universities only send the scanned copy of the letter through email. So, there are three ways that you can solve this problem.
- The first one is that you can email the university to mail you the hard copy of the letter. This is the method that I had chosen. The university mailed me the letter and I received it within 4-5 days.
- The second option can be used if the university can not mail you the hard copy. You can ask the university to send an exemption of acceptance letter for your visa application to the Turkish consulate.
- The third option that I have heard people mention is that just take a color photocopy of the scanned letter and attach it with the application. This is not a verified method.
Part 1: Bank Account Maintenance Certificate and Original Bank Statements of the Student or the Sponsor
So, there are two ways that this step can go about. Either you are funding your own self or your parents or somebody else is funding you. Some people have the misconception that they don’t require these documents if they have a scholarship. As I said, it is a misconception. The reason being that if someone is on a scholarship, they will need money for the airfare and other incurred expenses. So now that you have established who is going to be paying the money, you have to go get the certificate and the statement.
Bank account maintenance certificate is a certificate that tells the lump sum of money currently present in an account. The document also has to be signed and attested by a bank officer. This original document is to be submitted with the application. Be warned that some banks take a fee for producing this certificate. The fee is around Rs. 350.
[adinserter block= “8”]
After that, you need the original bank account statements of the sponsor. This too has to be an original document signed and attested by the bank officer. This document is often of multiple pages so only the last page is required to be signed and attested. The important point to note here is that you have to be careful about the dates of this document. Normally, the bank statement of only the last 3 months is required. But if you get this document in the middle of the month, it’s better to get a statement of the last 4 months. Also, whenever you go to submit the application at Gerry’s, the certificate and statement must not be older than a week. If it is older than this time, they reject the document and ask you to get a new one.
It’s also advised to get the certificate and statements with matching dates. For example, if the certificate has the issuing date of 24 July, the statement must be from 24 April to 24 July or 1st April to 24 July. Try to get these documents at the max of 3-4 days before you go to Gerry’s.
Alert: Get these documents scanned. You will need to upload these documents online.
Part 2: Guarantee Letter of Sponsor
I don’t know if this document is required if you are funding the expenses on your own but it’s better to get the affidavit on a stamp paper anyways which says that you will be funding your expenses yourself. But I am still of the opinion, that the affidavit is not needed in this case. On the other hand, if somebody else is funding you, you need this document. All you need to do is to ask your sponsor to get this document made. The sponsor’s CNIC will be required and he/she will be needed to sign that document.
Alert: Get this document scanned. You will need to upload this document online.
9. Consent Letter of Applicant for Verification of Documents
Source: TravelVisaBookings
This letter is just a letter that you need to write to the embassy for your visa application. You have to mention the following points in the letter.
- Why do you require the student visa? (You enter your admission details here)
- Who is going to be funding you? (mention the sponsor and the scholarship details, if you have one)
- List of documents attached with the application (just enter the whole list of documents in numerical format or bullet points)
Here is a sample of the cover/consent letter:
10. Consent letter of the Parents
If you are under 18 years old, you will need a signed letter from your parents mentioning that they have given their consent to you for going to study abroad.
Alert: Get this document scanned. You will need to upload this document online.
Now, we are still in the second section of the online application where all of the previously described documents are mentioned. After you have read the list of documents and you have checked the “I agree with the statements above.” box, the form will ask for your personal details. This is where you need your passport to be in your hand. All the details in this section have to be entered as they are in the passport. You will copy the name and surname from the passport. If your name is Taha Ali, this is how it will be mentioned on your passport:
Surname ALI, Given Names TAHA
So, you will enter Taha in Name and Ali in Surname. Enter your CNIC in National ID number and all of the other details. Then you move to the next section. A reference number will be sent to the email address which you must have provided in your details. Copy that reference number to the form.
11. Contact Information

Source: Contact Information
I don’t think I need to explain anything in this section. You just need to enter your contact information.
12. Travel Information
Firstly, the form will ask for the details of your passport. Read those details from your passport and enter them in the form. Secondly, there is a little questionnaire to be filled. Answer these questions to move to the next section.
Thirdly, you need the details of your travel. By now, you should have obtained your flight reservation and the travel health insurance. Otherwise, you can’t proceed forward in your online application. Following details have to be entered in this part of the form:
- Means of Transport: Air
- Duration of Stay: 90 days (Initially, a visa of 90 days is issued to you. You later get a residence permit in Turkey to extend the duration of the visa)
- Port of First Entry: The city of Turkey in which you will firstly land in.
- Date of Arrival: Enter the reaching date in Turkey that is mentioned on your flight reservation.
- Address: I entered “Bilkent University Graduate Dorms” in this section.
- City: Mention the city which you will be staying in.
- Telephone: I entered the contact number of the international student adviser in Bilkent Uni. It’s supposed to be an 11-digit number.
- Date of Expiry of Insurance.
- Covering of Travel Expenses and Living Costs: Since the other two options were not applicable, I selected “Myself”.
And Ta Daaaa!! We are moving to the last section!!!
13. Required Documents

Source: BCN4U
This is the last section where you need to upload the documents mentioned below. You can’t move to the next section until you have uploaded all of the documents. So, described below are some tricks as for how to get by this section.
* Bio-metric Photograph
Upload the scanned biometric photograph here.
* Authorization of Parents or Custodians
This document is only needed for students who are under 18 years of age. So if you are that young, just upload the scanned copy of the consent letter of your parents.
If you are older than 18 years, you are not supposed to upload this document. But as I mentioned before, the form won’t go forward until you have uploaded all of the documents. So what you should do here is to type a letter explaining that you are older than 18 years. Upload that word document over here. Here is a sample:
* Student Certificate/Acceptance Letter

Source: EIPL
Attach the image or PDF of the acceptance letter which the university must be emailed to you.
* Equivalence Statement
In case you have studied O-levels or A-levels, you need to get its equivalence from the appropriate issuing authorities. You will need to attach that equivalence document for both O and A levels. If you have done matric or F.Sc., just attach scanned copies of the original certificates.
If you are applying for masters, you will also need to upload your bachelor’s transcript (it must be in English).
[adinserter block= “15”]
* Income Statement or Sponsorship Letter
Upload the scanned copy of the bank account maintenance certificate, bank statements and the sponsorship/guarantee letter of parent/sponsor (if needed).
* Travel Health Insurance Certificate

Source: Colorado Business Roundtable
Upload the scanned copy of the travel health insurance certificate. You can also ask the travel agency to just email the document to you, which you can then upload with the application.
And now, you are done with your application. Print out the form, sign it and attach all of the required documents. I can’t guarantee that you will be able to submit your application in a single try at Gerry’s. They often make objections at simple things and return your application. But hopefully, you will be able to get it done anyways. Submit your documents at Gerry’s and you will have your passport in your hand (InshAllah) in 2-3 weeks.
Read Also : You Can FINALLY Fulfill Your Wish Of Getting Into Canadian Universities – Here’s How!